Showing posts with label dessert. Show all posts

Sunday, March 20, 2011

3.1415926....

March 14. 3.14. Pi day. How to celebrate other than with pie? I hosted an open pi day with friends and family where pie was served, all day. At the end of it, I was absolutely exhausted, but it was so much fun, and everyone pitched in! Here are a few pictures of the event...

I posted this on my front door for those who hadn't been to my house before to let them know they arrived at the right place

Rolling crust... I made enough for about 15 pies, which was too much


Pumpkin, courtesy of my friend Denise, and an apple pie with a brown sugar crust

Blueberry! Notice the fine lattice work, done by my cousin Anthony

Spinach pie for lunch (couldn't have dessert all day). It was a hit! the first pie to be finished in its entirety

Banana creme pie. The bananas look strange after coming out of the oven, but really really delicious. And I don't even like banana creme!

A glamour shot of the lemon meringue

Another glamour shot of the lemon meringue


My famous red wine apple pie! Notice the pi sign I carved into the top!

Red Wine Apple Pie
Pie Crust
-2 cups flour
-1 teaspoon salt
-5/8 cup shortening
-Some water and extra flour
Mix ingredients together, forming a ball. Separate into two equal halves. Roll out to fit 9” pie tin: One half for the base, other half for the top crust.
Filling
4 Apples
1 cup sugar
2 tablespoons flour
1/3 cup water
½ teaspoon cinnamon
½ teaspoon ginger
1 tablespoon lemon juice
1/3 cup red wine
Peel, core and finely chop the apples. Toss with the sugar, flour, spices, wine, water and lemon juice. Fill the pie with the fruit mixture and cover with the top half of the crust. Bake for 1 hour at 350° F


I hope you all enjoyed pi day!

Sunday, February 6, 2011

Apple Tarts: A Story in Pictures

As a child, I was told that sweet, sugar crusted apple dumplings were the secret of a Chinese baker in Vancouver. No matter how much money he was offered, no matter how many people asked, he never once gave out his prized recipe.

The coveted apple tart from a Vancouver bakery, photo from Sherman's Food Adventures

The recipe was kept under lock and key and locals lined up out the bakery doors to bring home a batch of the coveted bun-shaped pillows of hot, sweet, tender, flaky pastries. They say that he died with that recipe, and no how many times other bakers tried to emulate his apple tarts, none of them came out quite right.

Fast forward ten years. Add a talented aunt with a generous spatula.

The story continues with 2 packages of frozen puff pastry, a can of apple pie filling, flour, milk and sugar.

Each package of puff pastry thawed overnight, unknowingly resting before each square was to be divided into pieces of six, totalling twelve pieces per package. In total, 24 pieces of pastry were borne.

Before mitosis
One piece of puff pastry, after the split


Each piece of puff pastry was laid down in a pat of flour and flattened with a floured rolling pin. After cutting the apples in the filling down to small confetti-sized bits, I scooped a small amount and placed it in the middle so that it resembled a fried egg, sunny side up.


After brushing the edges of the pastry with milk, pinch the edges of the pastry together


Turn over the tarts and brush the tops with milk and dip in white sugar. Place down onto parchment paper pinched side down. Or get your brother to help you.

By the way,  ignore what's on TV. Obama and Harper had a joint press conference... that's all.


 At this point they can be frozen, but it is infinitely better to bake them fresh. They can be warmed up in the oven later. They will puff up a golden brown, the apple filling will bubble and swell, the baker's secret will now be yours to exploit, the family's compliments will come your way, and all the boys will conspire to make you theirs.

Bake at 400 degrees F for 15 minutes, 25 minutes if frozen or until golden brown. They look almost like medallions of gold, to the greedy.

My mother volunteered me to make these for Chinese New Year dinner before she even told me. Immediately, my family was impressed and ravenous, stealing glances towards the oven, sniffing the air in a way that was extremely obvious. Let the pastries sit before serving, as the filling inside will be extremely hot. Even grudging curmudgeon-y uncles will give you a nod and grunt of approval. And nobody will make comments about how you'll be on old maid the rest of your life.

Sunday, November 28, 2010

Challenge #2- Seeing green...tea.

Instead of waiting every 4 posts to do a challenge, both Maggie and I had so much fun with the first one that we decided to do a challenge every 2 posts. So we'll see how that goes!


This time around we are using green tea to make up any concoction. I blanched at first when Maggie suggested that this be the challenge--- I was so stuck and bewildered that I can honestly say that I wasn't sure if I could accept this challenge. I didn't even know where to buy matcha powder. But I did anyway.


It took me a full two weeks to find the right idea for this challenge. Among the rejects (and they were a bizarre lot) were: green tea ravioli, green tea pasta and green tea sauce. Uhhh.. gross. But then I thought, Green tea mousse! And that was brilliant, until I realized I had no idea how to make mousse and had never used matcha powder. I wasn't really ready to take that leap.


But then... one thing led to another, and I present today:


Green tea creme caramel (also known as flan):

Ingredients:
Matcha powder.. no English
1/3 cup sugar
3 tablespoons water
Butter for greasing
3 large eggs, plus 1 egg white
1 cup whipping cream
1 cup skim milk
1 tsp vanilla extract
1 tsp fine grade matcha powder
         NOTE: I had a hard time with the matcha. You can buy it at your local asian supermarket in the tea section.  Unfortunately all the packaging is in Japanese. And nobody that I know well enough to get matcha for me is Japanese or reads Japanese. The only label in English said 'Ingredients: GREEN TEA'.So I did what any logical person would do. I felt the packages. I noticed that some were different prices than others and that some felt different. Some felt grainy and others were finer. I went with the finest (and consequently, most expensive) matcha there was. I reccommend getting the finest you can find. Nobody likes grainy dessert.
2/3 cup sugar
pinch of salt

Start by dissolving 1/3 cup sugar and water over medium heat, stirring constantly until the mixture is tinted golden brown. Pour into buttered ramekins (I used 2 large ramekins because that's all I had, but you can do six little ones) until bottoms of ramekins are coated. Set aside.

Before the bake
In a large bowl, whisk together eggs (and extra egg white), vanilla, milk, cream , sugar, and salt. Once combined, take a small amount of the mixture and blend it together with the matcha powder for even green tea distribution, mixing it back into the bowl when fully blended.

Distribute mixture into ramekins evenly and place into baking dish. Pour water into the baking dish until the water reaches about an inch deep. Bake at 350 degrees. If using two large ramekins, bake for 1 1/2 hours. If using six small ramekins, bake for 45 minutes. Let chill for at least 3 hours.


Once chilled, unstick edges with a knife and tip 
upside down. Watch for liquidy caramel! So tasty! Ok. No it doesn't look pretty. But it really does taste good, I promise!


I found it funny that Katelyn was so uneasy by this challenge, because it was originally her idea!! (Yes, Katelyn, check our messages, you were the one to first bring it up =) NOTE FROM KATELYN: I remember throwing this challenge on the board... I just never expected to be voted on so soon! Also. I thought that I would have a better idea by the time we came to this challenge.. whoops!).  I was pretty excited because I already had a green-tea craft in my repertoire.  So unlike Katelyn, this challenge was fairly easy for me…  So I present to you a green tea body scrub.

Materials
  • 1 cup sugar
  • 5 tablespoon Epsom salt
  • 8-12 teaspoons of olive oil (if you have oily skin, I suggest using less…If you have dry skin, I suggest using more)
  • 2-3 teaspoons honey
  • 2 bags green tea
  • 2 bags lemon green tea
  • Small palmful of crushed mint
  • Small palmful of rosemary
  • Bowl
  • Spoon
  • Jar with lid (I used an empty, thoroughly cleaned out salsa jar.  I had previously decorated it with spray paint & acrylic paint)
This is a fairly customizable recipe...You can use fresh lemon zest, but only if you indeed to use the scrub immediately (the zest can mold over time).  Or you could use orange or lime zest (I would be curious to see how well a green tea, lime, dried basil scrub would turn out...)  You could also add Vitamin E, essential oils, dried flowers (I've used lavender before), etc.  This is the first time I have used mint and rosemary, I enjoyed the minty-fresh scent of the mint/rosemary combo.  I like this recipe because it's fairly dry compared to other homemade scrubs and it's convenient because chances are you have most of the ingredients (if not all of them) at home!
    Directions


    Pour sugar and Epsom salt into bowl.  Mix!


    Pour olive oil and honey into 
    sugar-salt mixture.  Mix!


    Cut open bags of tea, add to sugar-salt-oil-honey mixture.  Mix!


    Pour in mint and rosemary.  Mix!


    Put into jar.  Glue on labels (optional, see template, click on image, right click, "save image as" to save to your computer). 


    Perfect for a gift for a friend, or for yourself!  It smells minty and the green tea helps exfoliate to leave all skin types feeling nice and smooth.


    Sunday, November 14, 2010

    Tasty & Dairy-free = happy tummies and happy guests

    This past week, I had cousins come over for a delightful board games evening. It's a great, low key excuse to see people you live near but don't necessarily see often (or at all). Being a full time student with a part time job can get fairly tricky and extremely draining - never mind the fact that I hardly have time to do homework and blog - so having people over was a bit daring in regards to my schedule.

    But it trumped having NO social life, so it was a go. I cheated a bit-- I told them to come after dinner (I didn't get home until 5:30 that day) and I would provide tea and dessert. I had to be careful, though: Some members of my family are lactose-intolerant and pretty sensitive to any form of dairy. Even butter baked in the crust of things - which was definitely challenging, as all the desserts in my repertoire required butter, or sour cream, or yogurt, or milk, or cream, or cheese...

    And remember, when preparing these I was short on time and needed something that was either quick or something I could make in advance and pop into the freezer until I needed them.

    So after weeks of thought (yes it took weeks) this is how it all went down:

    Pop-Tart Pockets
    (Yields about 30 palm-sized pastries)

    Crust:
    1 454g package of Tenderflake shortening
    1 egg
    1 tablespoon vinegar
    2 teaspoons salt
    5 1/2 cups all purpose flour (plus extra for rolling out the dough)
    water

    This recipe is also on the packaging of the Tenderflake box, however unless you didn't know beforehand, you might not have thought to pick up vinegar, so voila.

    Mix salt and flour together and cut in the shortening with a fork or pastry blender until resembling coarse
    crumbs.

    Combine egg and water in a 250 ml/1 cup measure. Once combines, fill the rest of the measuring cup with water until the cup is filled (don't go over 250 ml).

    Mix wet and dry ingredients, forming a nice dough ball. Chill out in the fridge (the dough, not you. This recipe isn't difficult enough for that). Actually, I found that using this recipe yielded extremely easy, delicious pastry to work with- even better than using a butter crust. I know people who are adamant about pate brisee butter crusts, but an aunt of mine uses all and only Tenderflake. No compromise.

    While you're dough is cooling off, prepare the filling...

    Filling:
    Strawberry jam
    3 medium apples - I used Gala apples
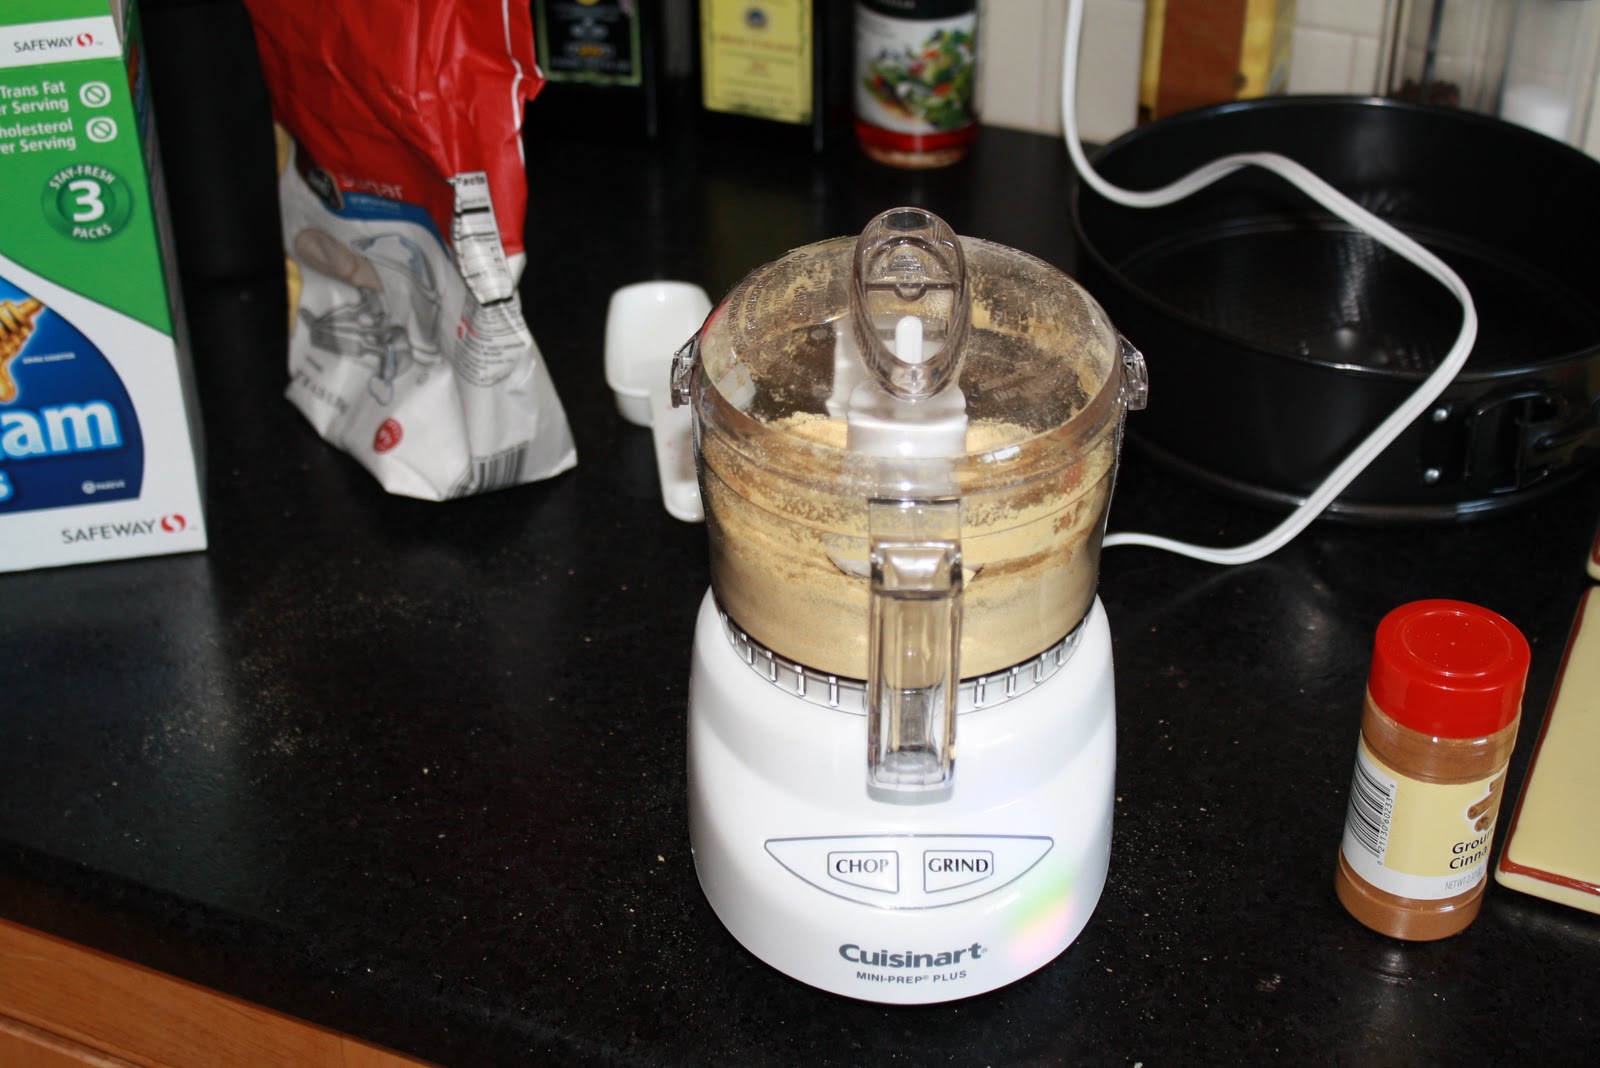
    1 teaspoon cinnamon
    1 lemon
    2 tablespoons sugar

    Cut up the apples into really small pieces. Smaller than dice. As small as you can get without getting frustrated. Mix in a bowl with lemon juice of 3/4 of the lemon, sugar and cinnamon.

    Now you can get to work!


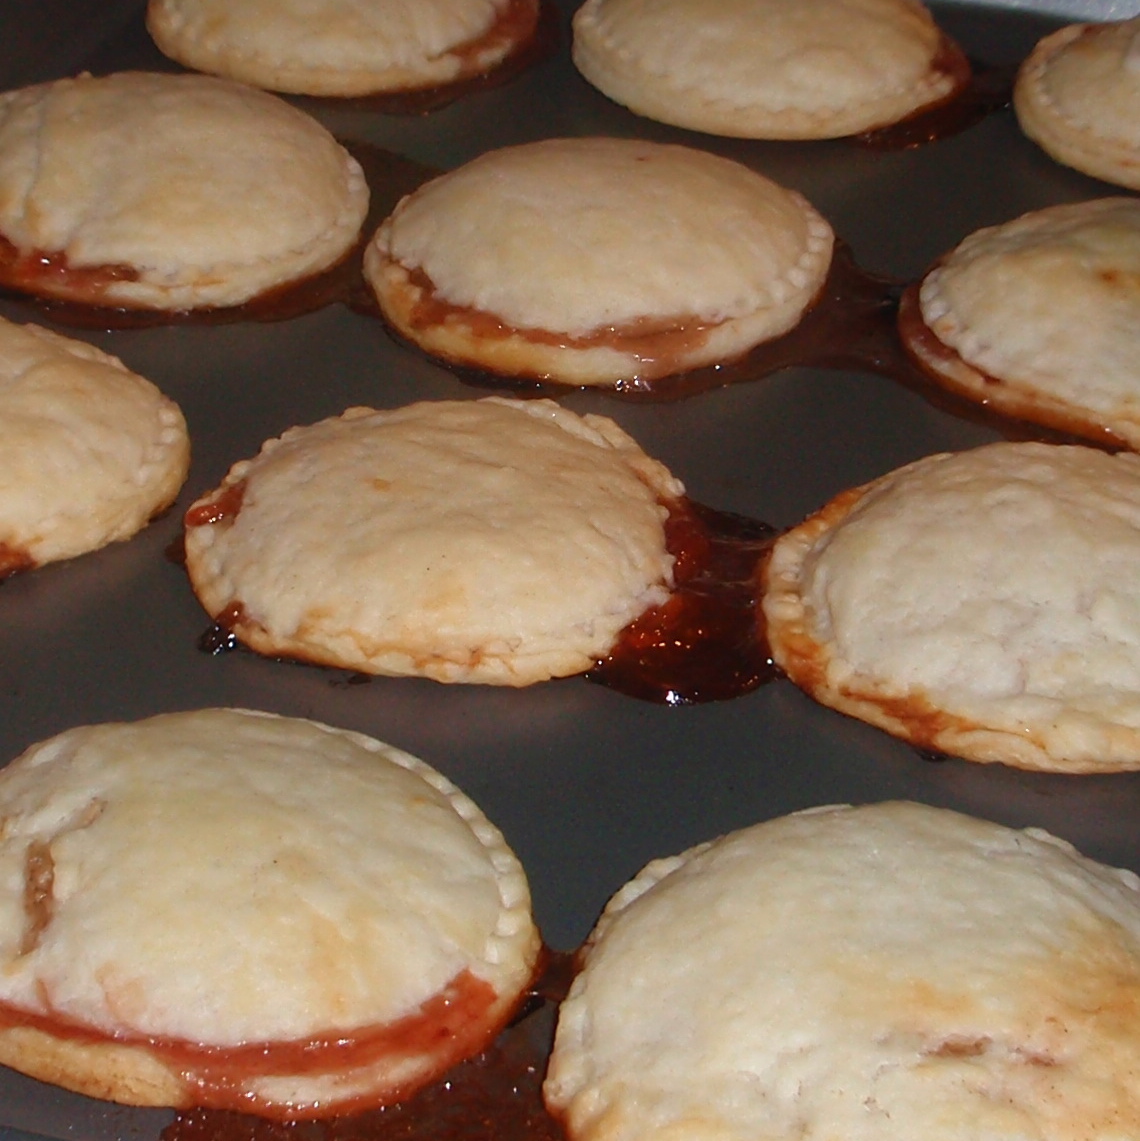
    Roll out dough on a floured surface with a floured rolling pin. Cut circles (or rectangles, whatever) about the size of your palm. I used a little sandwich press thing that my mom has had for a long time but never used (terrible waste of money, until now) but you can use an appropriately sized cookie cutter. On each circle, spoon a small amount of jam into the centre followed by a small amount of apple mix. Cover each with another circle of dough and press edges together. You now have pop-tart-like pockets!

    They can be frozen at this point. Just be careful with these little guys, They are delicate and can leak, so make sure you've pinched all edges very well and don't smush them in the freezer. Seal them up air-tight if you can- they'll be ok for a day if you don't, but if you want to make them well in advance for a 'just-in-case' or 'i-have-no-time!' dessert, freezer burned pastry is gross. So. Baker beware.

    When you're ready to bake them, pop them into the oven on an ungreased cookie sheet at 400 degrees F for 20 minutes or until pastry shows some browning. While baking, make the icing. Warning: the pastries will leak a bit, as shown. No big deal.


    Icing:
    2 cups icing sugar
    1/4 remaining of the lemon, juiced
    3 tablespoons hot water

    Mix all together until you get a nice icing consistency (you might have to play around with the ingredient ratio here) and drizzle lemony icing over hot, flaky pastry.
    Done. Your guests will go back for thirds, possibly fourths. I got tons of compliments! If dairy is not a concern, try making a cream cheese icing. Then your guests will worship you. And nobody's tummy will hurt!

    Yum.

    Sunday, October 31, 2010

    Comfort food!

    Welcome.

    I want to begin by saying that I almost decided not to ever post this.  But I decided to go ahead do it.  You will soon understand why.  

    I have a close group of friends from my undergrad.  They are wonderful people and I love them dearly.  Every month, we try to get together for a dinner.  We all rotate who will host the dinner, and it was my turn for the month of October.  I decided on a theme of "comfort".  Comfort food, comfort clothes (yay, sweat pants) and a comfortable competition!

    Here is everything you will need to host your own "Maybe if you ate more comfort food, you wouldn't go around shooting people (A lengthy party title, I know, but it's a quote from Hugo, from Lost, a show that I loved).
    Three different types of chili.


    Rummikub (or any other type of game) and prizes.

    Pumpkin Cheesecake! (See below)

    Things for guests to bring: fritos, chips, tortillas, cheese, cornbread, drinks, etc.  

    The party was fun, relaxing and comfortable.  Buuuut, the party was almost ruined by a near baking failure.  Which is why I almost did not go through with this post...  Just be warned, I almost killed the key component to this night of comfort. 

    Pumpkin Cheesecake
    This recipe came partly from my mother and partly from a coworker, with little tidbits from info online I found about making a cheesecake.  This was the first time I had made a cheesecake by myself, so it was an adventure (as you will see).

    For the crust...

    1 1/2 cups finely ground graham cracker crumbs
    1/4 cup white sugar
    6 tablespoons butter, melted
    dash of cinammon (I would also be curious to add perhaps some nutmeg or pumpkin spice next time...) 


    For the cheesecake...

    3 (8 ounce) packages cream cheese, softened (I used reduced fat)
    1/2 cup sour cream (Again, used reduced fat)
    1/2 cup white sugar
    1/2 teaspoon vanilla extract
    2 eggs
    1 cup pumpkin pie mix (this amount is flexible, depending on your pumpkin preferences)
    1/2 teaspoon ground cinnamon
    1 pinch ground nutmeg


    For the toppings...

    Caramel (Next time, I want to make my own...but for this go around, we used store bought)
    Whipped Cream


    For the cooking...
    • Preheat your oven to 375 degrees F.
    • Mix graham crackers, sugar, melted butter and cinnamon until well blended.  (I had to do this in two halves because my mixer is so tiny, but it worked out perfectly)


    • Press the graham cracker mixture into the bottom of a cheesecake springform pan.  Bake for 7 minutes. 


    •  Drop the oven temperature down to 325 degrees F.


    • Combine cream cheese, sugar and vanilla.  Then, blend in eggs one at a time.  


    • Fold in the sour cream.


    • Remove 1 1/2 cups of the batter and gently spread it over the crust in the cheesecake springform pan. 


    • Add pumpkin mix, cinnamon and nutmeg and blend at a low speed until everything is well mixed.  


    • Spread over the batter in the crust!


    • Bake for an hour. 

    • Turn off the oven, leave cheesecake in the oven for another hour (this prevents the cheesecake from cracking).

    • Refrigerate for at least three hours.

    • Spoon on a layer of caramel and/or whipped cream.


    Theoretically, this should result in a beautiful, pumpkin cheesecake.  Buuuuut, when I opened up the stove, I found this.

    
    PANIC!!!!
    
    I realized that I probably put the cheesecake too close to the top of the oven, thus the cheesecake looked super burned, which resulted in a super panicked me because I did not have the time or ingredients to bake it again. 

    
    A little less panicked.
      But then, I started peeling off the top layer, and suddenly I was very, very relieved.  It was perfect! 
    
    Not so panicked at all any more.
    

     Underneath the crispy top was a perfectly baked cheesecake! 


    Adding the layer of caramel helped hide some of this near bake failure.  Adding the whipped cream would have covered it completely, but some of the guests who attended the party did not like whipped cream, so we opted to let people put it on their own individual slices.

     
    Not extremely aesthetically pleasing.  But what Katelyn and I really focus on is form AND function.  In this case, I'd say this is about 25% form (not so pretty) and 75% function (delicious!).

     As I said earlier, I almost did not post this, but really the best part was no one even knew that I almost killed the dessert, and I received lots and lots of compliments.  I am pretty sure I will be making it again for Thanksgiving, I'm sure my family will love it. 


    Oh, and please have a happy halloween!

    Blogging tips